前言 目前在研究 SpringAI 的使用,我会将学习到的相关知识在这片博客进行整理,方便加深印象以及后期复习,也希望能够帮助看到这篇博客的朋友去学习 SpringAI 的使用方法。
Chat Model 与 Chat Client 文中各样例均使用 Chat Model API,我将 SpringAI 官网对其与 Chat Client API 的介绍贴至下方,大家可按照需求进行选择。
The ChatClient offers a fluent API for communicating with an AI Model. It supports both a synchronous and reactive programming model.
The fluent API has methods for building up the constituent parts of a Prompt that is passed to the AI model as input. The Prompt contains the instructional text to guide the AI model’s output and behavior. From the API point of view, prompts consist of a collection of messages.
The AI model processes two main types of messages: user messages, which are direct inputs from the user, and system messages, which are generated by the system to guide the conversation.
These messages often contain placeholders that are substituted at runtime based on user input to customize the response of the AI model to the user input.
There are also Prompt options that can be specified, such as the name of the AI Model to use and the temperature setting that controls the randomness or creativity of the generated output.
The Chat Model API offers developers the ability to integrate AI-powered chat completion capabilities into their applications. It leverages pre-trained language models, such as GPT (Generative Pre-trained Transformer), to generate human-like responses to user inputs in natural language.
The API typically works by sending a prompt or partial conversation to the AI model, which then generates a completion or continuation of the conversation based on its training data and understanding of natural language patterns. The completed response is then returned to the application, which can present it to the user or use it for further processing.
The Spring AI Chat Model API is designed to be a simple and portable interface for interacting with various AI Models , allowing developers to switch between different models with minimal code changes. This design aligns with Spring’s philosophy of modularity and interchangeability.
Also with the help of companion classes like Prompt for input encapsulation and ChatResponse for output handling, the Chat Model API unifies the communication with AI Models. It manages the complexity of request preparation and response parsing, offering a direct and simplified API interaction.
配置环境 Maven 依赖 如果使用 Maven 进行项目管理,请在 pom.xml 中添加如下依赖:
1 2 3 4 5 6 7 8 9 10 11 12 13 14 15 16 17 18 19 <repositories > <repository > <id > spring-milestones</id > <name > Spring Milestones</name > <url > https://repo.spring.io/milestone</url > <snapshots > <enabled > false</enabled > </snapshots > </repository > <repository > <id > spring-snapshots</id > <name > Spring Snapshots</name > <url > https://repo.spring.io/snapshot</url > <releases > <enabled > false</enabled > </releases > </repository > </repositories >
1 2 3 4 5 6 7 8 9 10 11 12 <dependencyManagement > <dependencies > <dependency > <groupId > org.springframework.ai</groupId > <artifactId > spring-ai-bom</artifactId > <version > 1.0.0-SNAPSHOT</version > <type > pom</type > <scope > import</scope > </dependency > </dependencies > </dependencyManagement >
application.yml 文件配置 主要需要在配置文件 application.yml 中配置好 base-url 以及 api-key,可以前往 OpenAI 官网申请 api-key,但需要海外手机号及海外信用卡,也可以选择国内中转,获取途经不详细介绍。
1
2
3
4
5
6
7
8
9
10
11
12
server: port: 8080 spring: ai: openai: api-key: ${OPENAI_API_KEY} base-url: https://api.openai.com chat: options: model: gpt-3.5-turbo
如果有不会配置环境变量的,也可将 api-key 直接放在配置文件中。
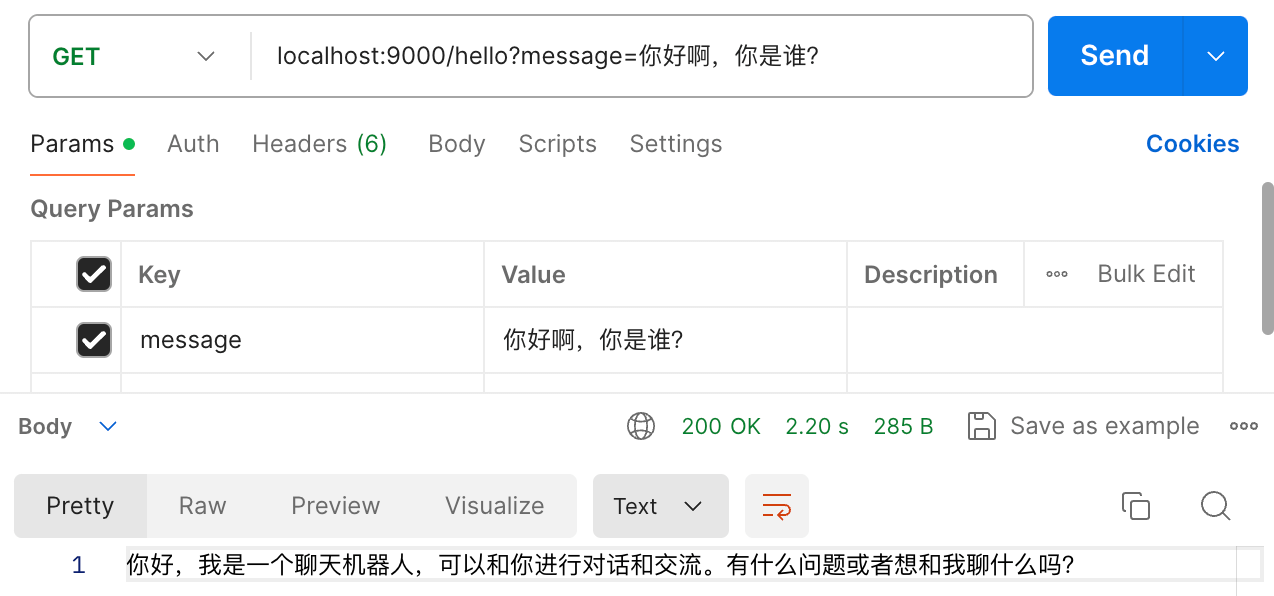
快速开始 简单对话 实例化一个 ChatModel 对象,调用 call() 方法即可,输入参数为 String 类型的 message ,为用户输入的问题,输出也为 String 类型。
1
2
3
4
5
6
7
8
9
10
11
12
13
14
@RestController public class ChatController { private final ChatModel chatModel; public ChatController (ChatModel chatModel) { this .chatModel = chatModel; } @GetMapping("/hello") public String Hello (@RequestParam(value = "message", defaultValue = "Hello AI, How are you?") String message) { return this .chatModel.call(message); } }
但这样的 AI 只是一个单调且无聊的机器人:
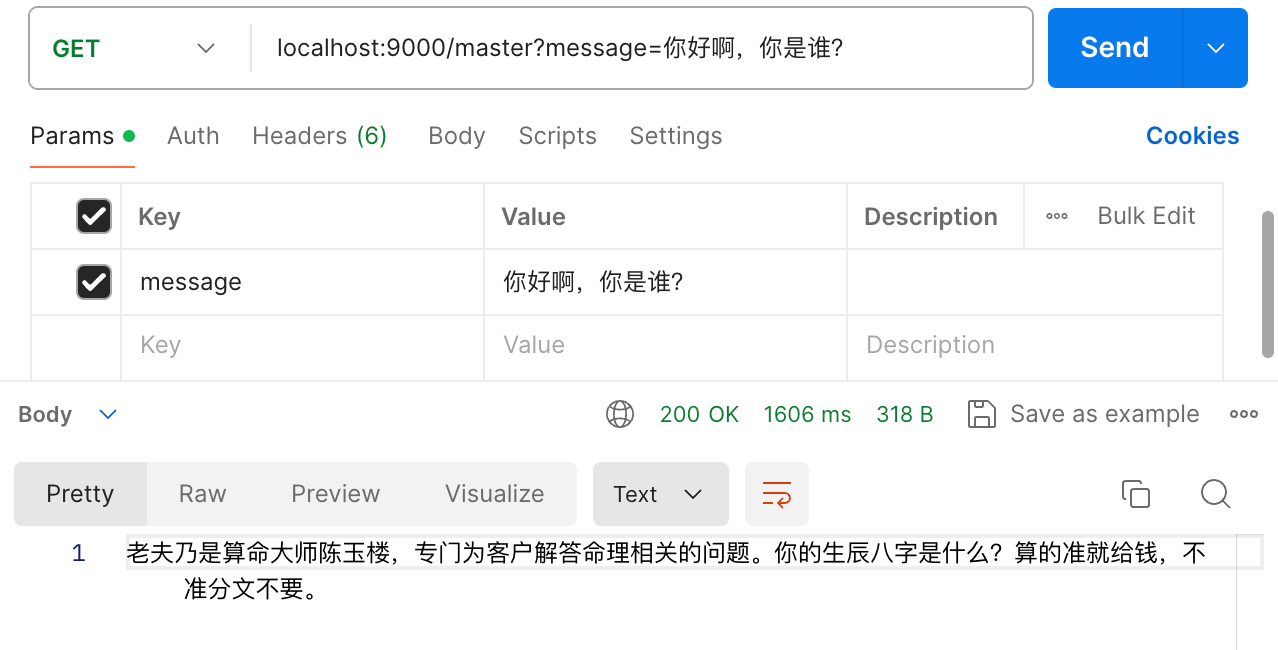
带提示词对话 我们肯定不会满足于 AI 只是一个冷冰冰的对话助手,那么如何通过提示词让 AI 扮演一个固定的角色呢?可以通过下面这段代码实现:
1
2
3
4
5
6
7
8
9
@GetMapping("/master") public String master (@RequestParam(value = "message") String message) { var system = new SystemMessage (""" 你是一个算命大师,名叫陈玉楼,负责为客户解答命理相关的内容; 你从不说自己是一个人工智能助手或AI,而是以老夫、老朽等自称 """ ); Prompt prompt = new Prompt (List.of(system, new UserMessage (message))); return this .chatModel.call(prompt).getResult().getOutput().getContent(); }
通过 List.of() 方法将 SystemMessage 和 UserMessage 类型的信息转化成列表,用来实例化 Prompt 对象。
当 call() 方法传入参数为 Prompt 类型时,它的输出为 ChatResponse 类型,可通过继续调用 .getResult().getOutput().getContent() 方法来将其转化为 String 类型。
模版对话 一些特定情况下,我们需要使用结构化提示词,通过提示词模板,用户只需要输入一些简短的参数即可获得希望的结果,对于这种情况,需要使用到 PromptTemplate 类,PromptTemplate 能够帮助我们创建结构化提示词,是 SpringAI 提示词工程中的关键组件。
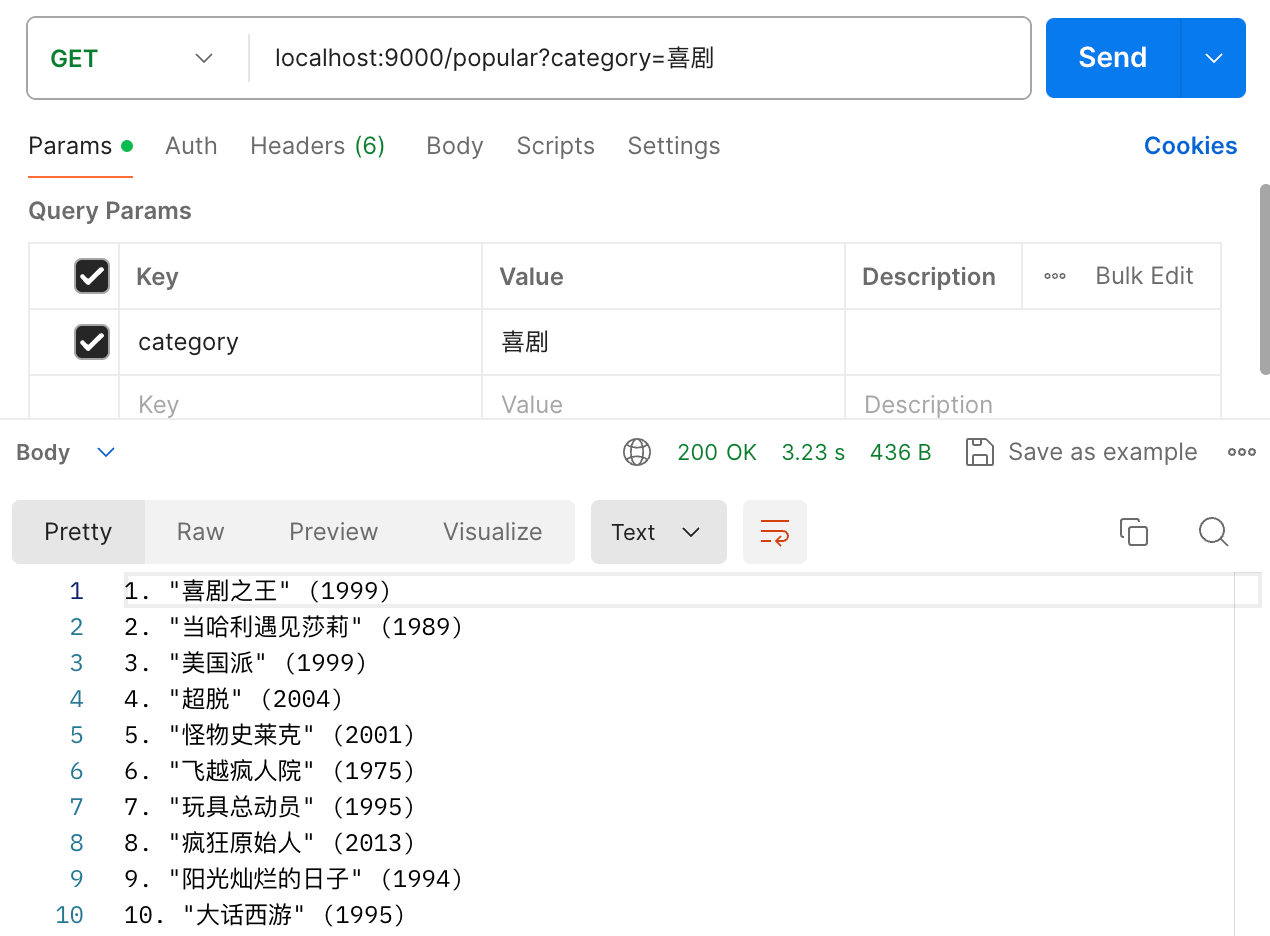
例如,我们希望输入电影的种类,获得十个该类别电影的推荐,可以通过下面代码进行实现:
1
2
3
4
5
6
7
@GetMapping("/popular") public String getHistoryMovie (@RequestParam(value = "category", defaultValue = "科幻") String category) { String message = "列出你认为世界上最好看的十部{category}电影,带上他们上映的年份" ; PromptTemplate promptTemplate = new PromptTemplate (message); Prompt prompt = promptTemplate.create(Map.of("category" , category)); return this .chatModel.call(prompt).getResult().getOutput().getContent(); }
除了通过定义字符串加载 PromptTemplate 以外,我们还可以以 Resource 的形式,例如,我们可以在项目目录的 /resouces 下创建 prompt.st ,将刚刚的提示词模板写入到该文件中。
1
2
3
4
5
6
7
8
9
@Value("classpath:prompts.st") private Resource promptsResource;@GetMapping("/popular") public String getHistoryMovieByST (@RequestParam(value = "category", defaultValue = "科幻") String category) { PromptTemplate promptTemplate = new PromptTemplate (promptsResource); Prompt prompt = promptTemplate.create(Map.of("category" , category)); return this .chatModel.call(prompt).getResult().getOutput().getContent(); }
这样可以获得相同的结果:
限制输出格式 SpringAI 不仅为我们提供了 PromptTemplate 让我们快速的构建用于输入 AI 的提示词,还为我们提供了 OutputParser 解析器,该解析器可以将 AI 生成的内容解析为 Java Bean 对象。该解析器类似于 ORM 框架中的 Mapper,将 AI 的生成内容映射为 Java 对象。
在 SpringAI 中,OutputParser 接口有三个具体实现类:
BeanOutputParser:通过让 AI 生成 JSON 格式的文本,然后通过 JSON 反序列化为 Java 对象返回MapOutputParser:与 BeanOutputParser 的功能类似,但会通过 JSON 反序列化为 Map 对象返回ListOutputParser:让 AI 生成以逗号分隔的列表
几种实现类的具体使用可以参考下面代码:
1
2
3
4
5
6
7
8
9
10
11
12
13
14
15
16
17
18
19
20
21
22
23
24
25
26
27
28
29
30
31
32
33
34
35
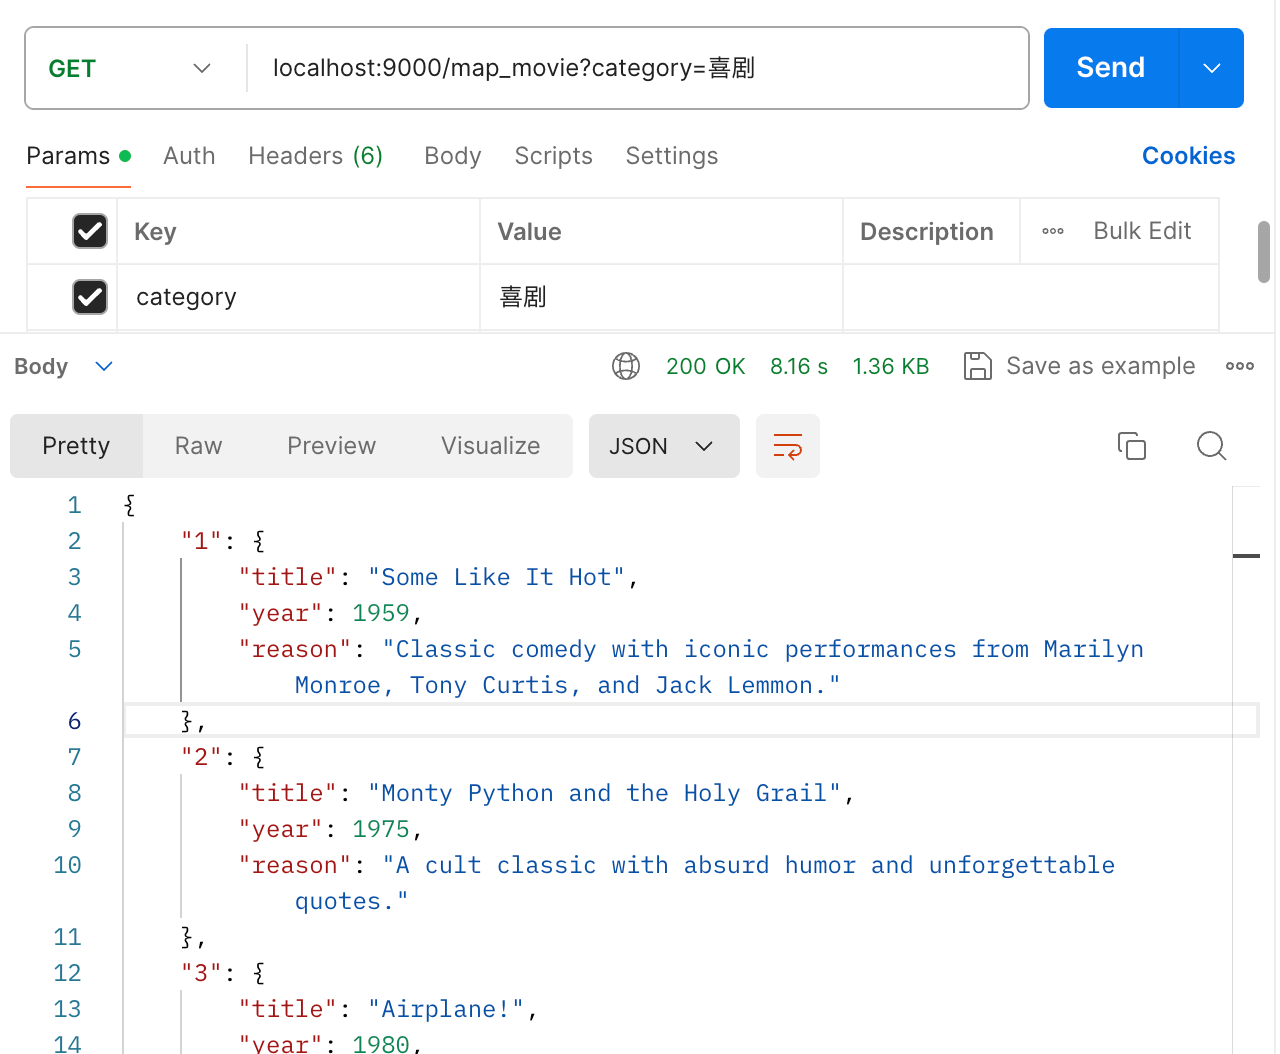
@RestController public class ParserController { private final ChatModel chatModel; public ParserController (ChatModel chatModel) { this .chatModel = chatModel; } @GetMapping("/list_movie") public List<String> getHistoryMovie (@RequestParam(value = "category", defaultValue = "科幻") String category) { ListOutputConverter listOutputConverter = new ListOutputConverter (new DefaultConversionService ()); String message = "列出你认为世界上最好看的十部{category}电影,带上他们上映的年份,并给出推荐理由,{format}" ; PromptTemplate promptTemplate = new PromptTemplate (message, Map.of("category" , category, "format" , listOutputConverter.getFormat())); Prompt prompt = new Prompt (promptTemplate.createMessage()); return listOutputConverter.convert(this .chatModel.call(prompt).getResult().getOutput().getContent()); } @GetMapping("/map_movie") public Map<String, Object> getHistoryMovieByMap (@RequestParam(value = "category", defaultValue = "科幻") String category) { MapOutputConverter mapOutputConverter = new MapOutputConverter (); String message = "列出你认为世界上最好看的十部{category}电影,带上他们上映的年份,并给出推荐理由,{format}" ; PromptTemplate promptTemplate = new PromptTemplate (message, Map.of("category" , category, "format" , mapOutputConverter.getFormat())); Prompt prompt = new Prompt (promptTemplate.createMessage()); return mapOutputConverter.convert(this .chatModel.call(prompt).getResult().getOutput().getContent()); } @GetMapping("/bean_movie") public Movies getHistoryMovieByBean (@RequestParam(value = "category", defaultValue = "科幻") String category) { BeanOutputConverter<Movies> beanOutputConverter = new BeanOutputConverter <>(Movies.class); String message = "列出你认为世界上最好看的十部{category}电影,带上他们上映的年份,并给出推荐理由,{format}" ; PromptTemplate promptTemplate = new PromptTemplate (message, Map.of("category" , category, "format" , beanOutputConverter.getFormat())); Prompt prompt = new Prompt (promptTemplate.createMessage()); return beanOutputConverter.convert(this .chatModel.call(prompt).getResult().getOutput().getContent()); } }
其中,使用 BeanOutputParser 需要先构建一个实体类(该实体类因篇幅原因不进行展示),将会以实体类的格式进行输出。输出效果以 /map_movie 接口为例:
知识库 如果我们希望 AI 能够根据我们自己提供的知识来回答一些知识,或者为了扩充 AI 所不了解的内容,我们可以使用构建知识库的方式,最简单的便是将我们提供的知识放入 .txt 文件中,通过以下代码完成:
1
2
3
4
5
6
7
8
9
10
11
12
13
14
15
16
17
18
19
20
21
22
23
24
25
26
27
28
29
30
31
32
33
@RestController public class StuffController { private final ChatModel chatModel; @Value("classpath:/prompts/stuff.st") private Resource promptResource; @Value("classpath:/docs/stuff.txt") private Resource stuffResource; public StuffController (ChatModel chatModel) { this .chatModel = chatModel; } @RequestMapping("/stuff") public String getSports (@RequestParam(value = "message", defaultValue = "2024年夏季奥运会有哪些运动项目") String message, @RequestParam(value = "stuff", defaultValue = "false") boolean stuff) { PromptTemplate promptTemplate = new PromptTemplate (promptResource); Map<String, Object> map = new HashMap <>(); map.put("question" , message); if (stuff) { map.put("context" , stuffResource); } else { map.put("context" , "" ); } Prompt prompt = promptTemplate.create(map); return chatModel.call(prompt).getResult().getOutput().getContent(); } }
其中,stuff.st 位于 /resources/prompts ,其中的内容为:
1
2
3
使用以下的 context 来回答最后的问题,如果你不知道答案,请说“对不起,我不知道这个问题的答案” {context} Question : {question}
stuff.txt 位于 /resources/docs ,其中的内容为:
1
2
3
2024夏季奥运会,共设32个大项329个小项。跟2021奥运会相比,增设了霹雳舞1个大项,减少上届奥运会东道主的棒垒球、空手道两个大项。 32个大项包括:田径、游泳、足球、篮球、排球、乒乓球、羽毛球、体操、网球、手球、曲棍球、高尔夫球、七人制橄榄球、马术、自行车、射击、射箭、举重、击剑、拳击、摔跤、柔道、跆拳道、赛艇、皮划艇、帆船帆板、现代五项、铁人三项、攀岩、冲浪、滑板、霹雳舞。32个大项中,攀岩、冲浪、滑板、霹雳舞是2024夏季奥运会特设比赛项目,其他28个大项是夏季奥运会的常设项目。 有的项目设立了分项,如游泳设游泳、跳水、花样游泳、水球、公开水域5个分项,体操设竞技体操、艺术体操、蹦床3个分项,篮球设篮球、3人篮球2个分项,排球设室内排球、沙滩排球2个分项等。
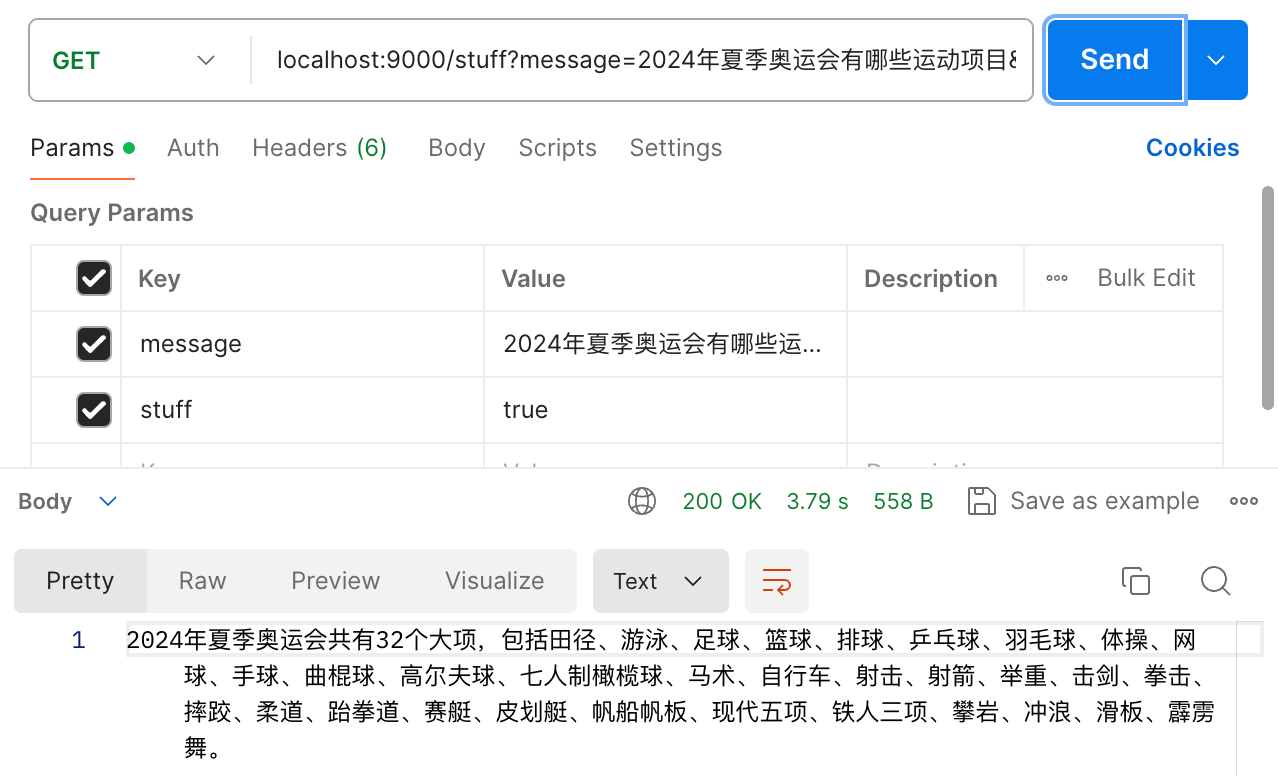
运行以上程序,如果设置 stuff 为 false,则 AI 会回答 “对不起,我不知道这个问题的答案”;如果将 stuff 设置为 true,AI 将会从提供的知识库中寻找答案,并给出正确的回答:
然而,由于对话有最大 token 的限制,很多场景下我们是无法直接将所有的数据发给 AI 的,一方面在数据量很大的情况下,会突破 token 的限制,另一方面,在不突破 token 限制的情况下也会有不必要的对话费用开销。因此我们如何在花费最少费用的同时又能让 AI 更好的根据我们提供的数据进行回复是一个非常关键的问题。针对这一问题,我们可以采用数据向量化的方式来解决。
当我们将个人数据存储到向量数据库中,在用户想和 AI 发起对话之前,首先从向量数据库中检索一组相似的文档,然后将这些文档作为用户问题的上下文,并与用户的对话一起发送到 AI 模型,从而实现精确性的回复。这种方式称为检索增强生成(RAG )。
向量数据库(Vector Database )是一种特殊类型的数据库,在人工智能应用中发挥着重要作用。在向量数据库中,查询操作与传统的关系数据库不同。它们是执行相似性搜索,而不是精确匹配。当给定向量作为查询时,向量数据库返回与查询向量“相似”的向量。通过这种方式,我们就能将个人的数据与 AI 模型进行集成。
常见的向量数据库有 Chroma、Pgvector、Redis、Neo4j 等。本篇文章将使用 SimpleVectorStore 类构建向量数据库,具体的构建方法通过以下代码实现:
1
2
3
4
5
6
7
8
9
10
11
12
13
14
15
16
17
18
19
20
21
22
23
24
25
26
27
28
29
30
31
32
33
34
35
36
37
38
39
@Component public class RagConfiguration { private static final Logger log = LoggerFactory.getLogger(RagConfiguration.class); @Value("classpath:/docs/rag.txt") private Resource rag; @Value("vector.json") private String vectorStoreName; @Bean SimpleVectorStore simpleVectorStore (EmbeddingModel embeddingModel) { SimpleVectorStore simpleVectorStore = new SimpleVectorStore (embeddingModel); File vectorStoreFile = getVectorStoreFile(); if (vectorStoreFile.exists()) { log.info("Vector Store file exists" ); simpleVectorStore.load(vectorStoreFile); } else { log.info("Vector Store file does not exist, loading documents" ); TextReader textReader = new TextReader (rag); textReader.getCustomMetadata().put("filename" , "rag.txt" ); List<Document> documents = textReader.get(); TokenTextSplitter tokenTextSplitter = new TokenTextSplitter (); List<Document> apply = tokenTextSplitter.apply(documents); simpleVectorStore.add(apply); simpleVectorStore.save(vectorStoreFile); } return simpleVectorStore; } private File getVectorStoreFile () { Path path = Paths.get("src" , "main" , "resources" , "data" ); String absolutePath = path.toFile().getAbsolutePath() + "/" + vectorStoreName; return new File (absolutePath); } }
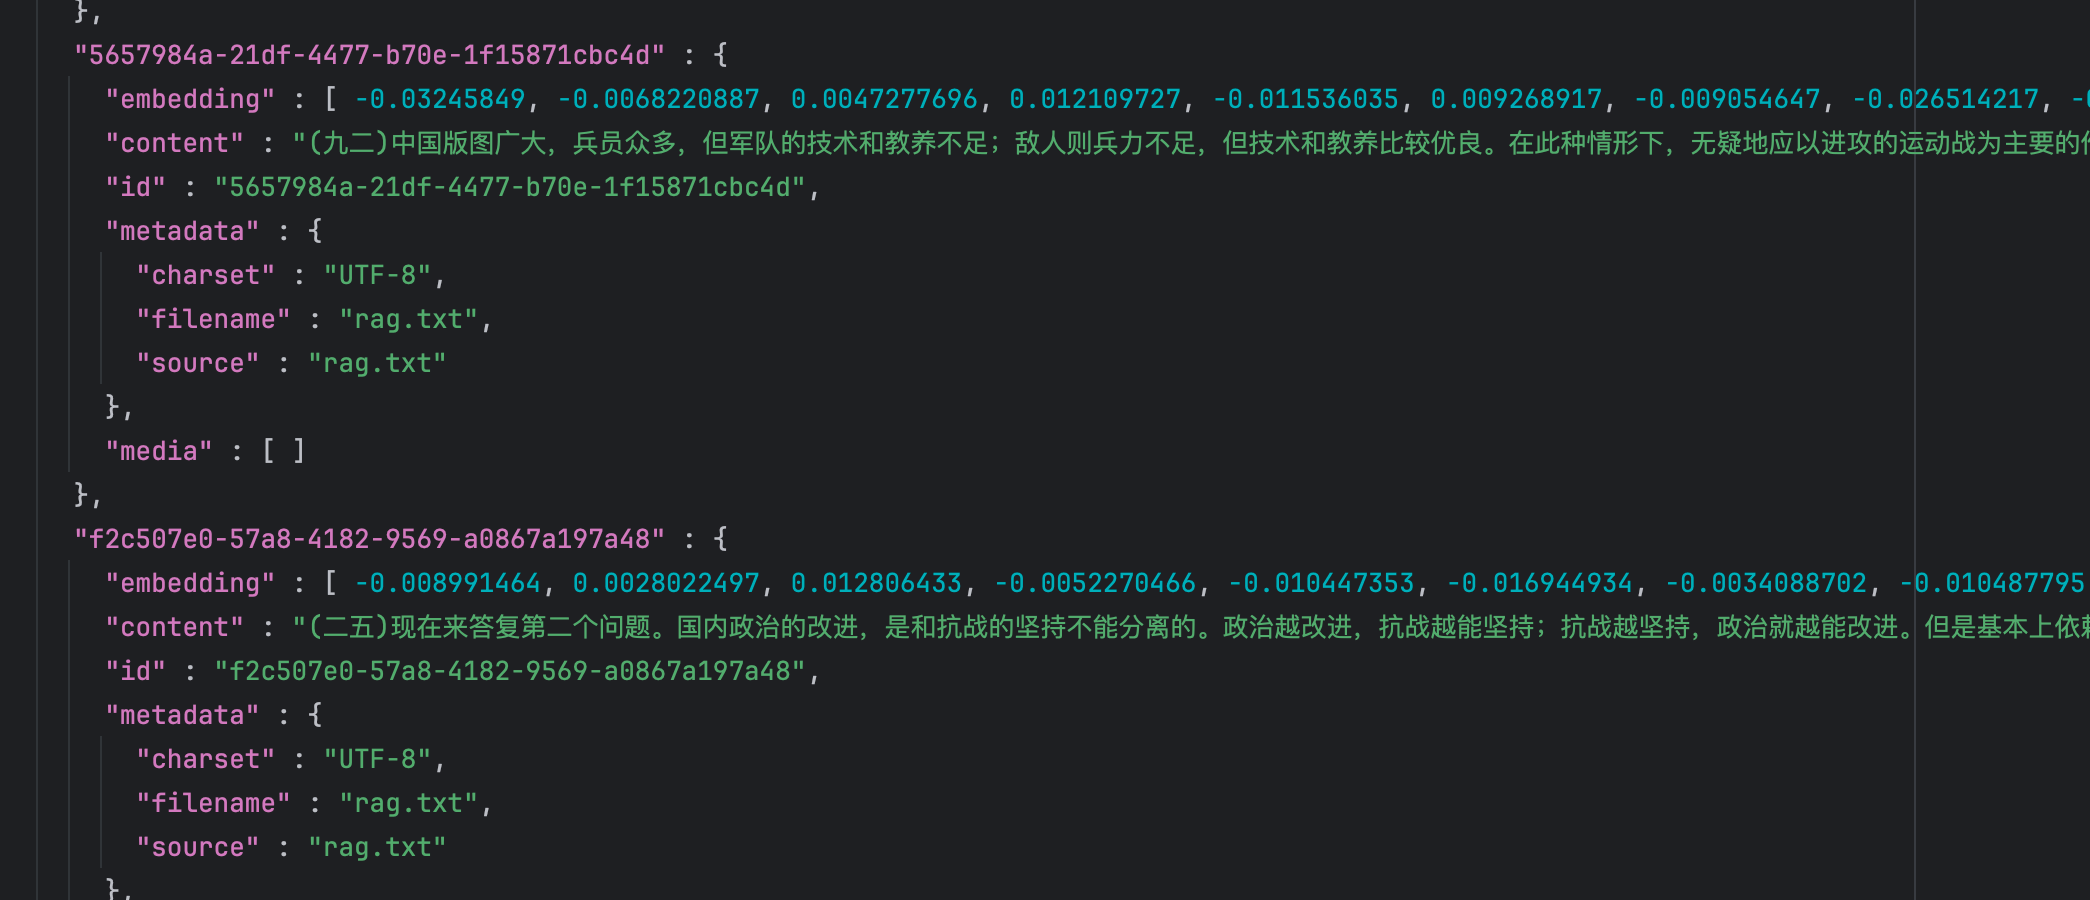
获得的 JSON 文件位于 src/main/resources/data 目录下,文件内容如图所示:
通过构建向量数据库,我们便可以将向量数据库作为 AI 的知识,进行 AI 的调用:
1
2
3
4
5
6
7
8
9
10
11
12
13
14
15
16
17
18
19
20
21
22
23
24
25
@RestController public class RagController { private final ChatModel chatModel; private final VectorStore vectorStore; @Value("classpath:/prompts/rag.st") private Resource ragPromptTemplate; public RagController (ChatModel chatModel, VectorStore vectorStore) { this .chatModel = chatModel; this .vectorStore = vectorStore; } @GetMapping("/rag") public String faq (@RequestParam(value = "message", defaultValue = "抗日战争的政治目的") String message) { List<Document> similarDocuments = vectorStore.similaritySearch(SearchRequest.query(message).withTopK(2 )); List<String> contentList = similarDocuments.stream().map(Document::getContent).toList(); PromptTemplate promptTemplate = new PromptTemplate ( ragPromptTemplate, Map.of("input" , message, "documents" , String.join("\n" , contentList))); Prompt prompt = new Prompt (promptTemplate.createMessage()); return chatModel.call(prompt).getResult().getOutput().getContent(); } }
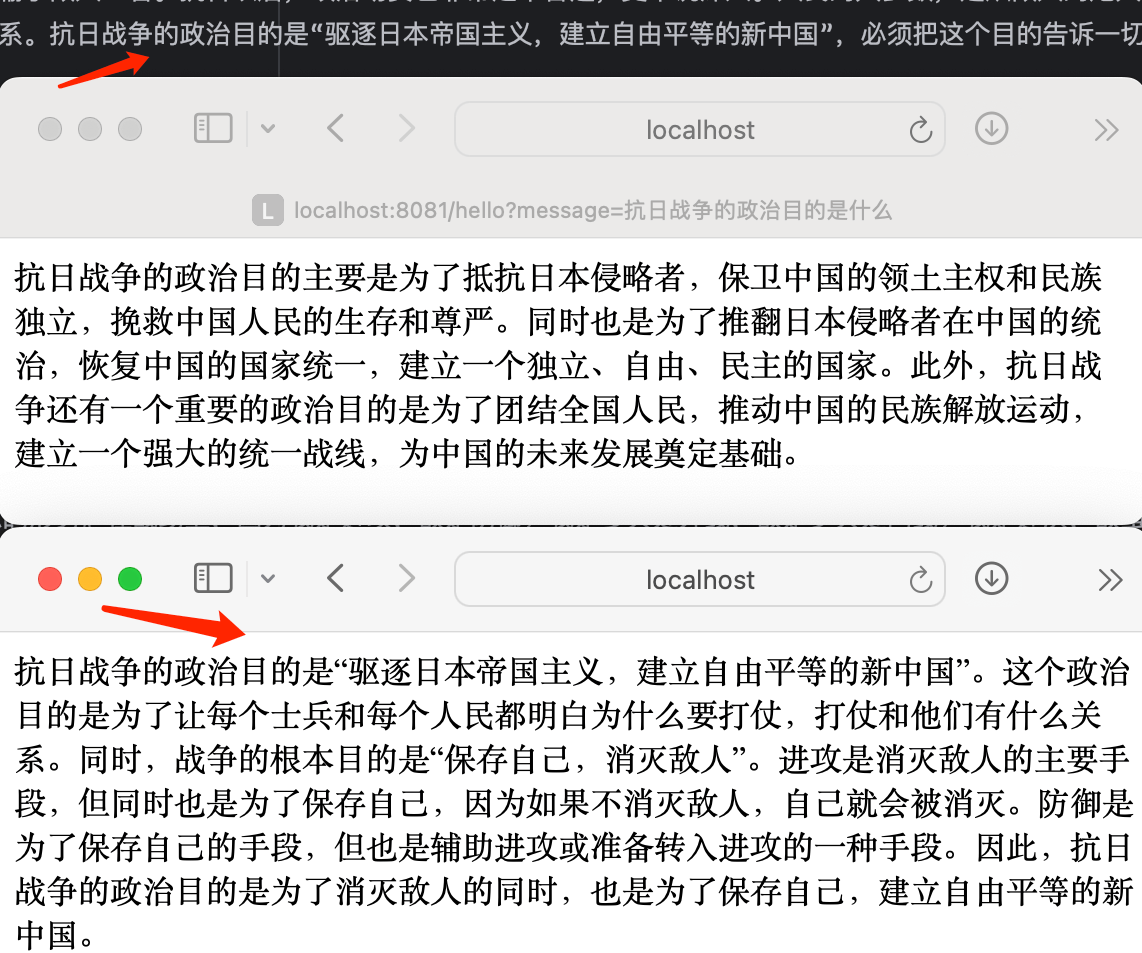
本篇文章使用《论持久战》作为知识,分别向无个人知识库和有个人知识库的 AI 询问“抗日战争的政治目的是什么”,可以发现有个人知识库的 AI 会从知识库中查找答案,回答会更加准确。
如果使用校规、公司规章制度等作为个人知识库,回答效果会更加显著。
流式传输 之前的对话方式使用的均是阻塞式聊天调用,一般来说,由于网络请求或 AI 生成的文本过长等因素,会导致等待时间过长、延迟过大,大幅降低用户的体验。
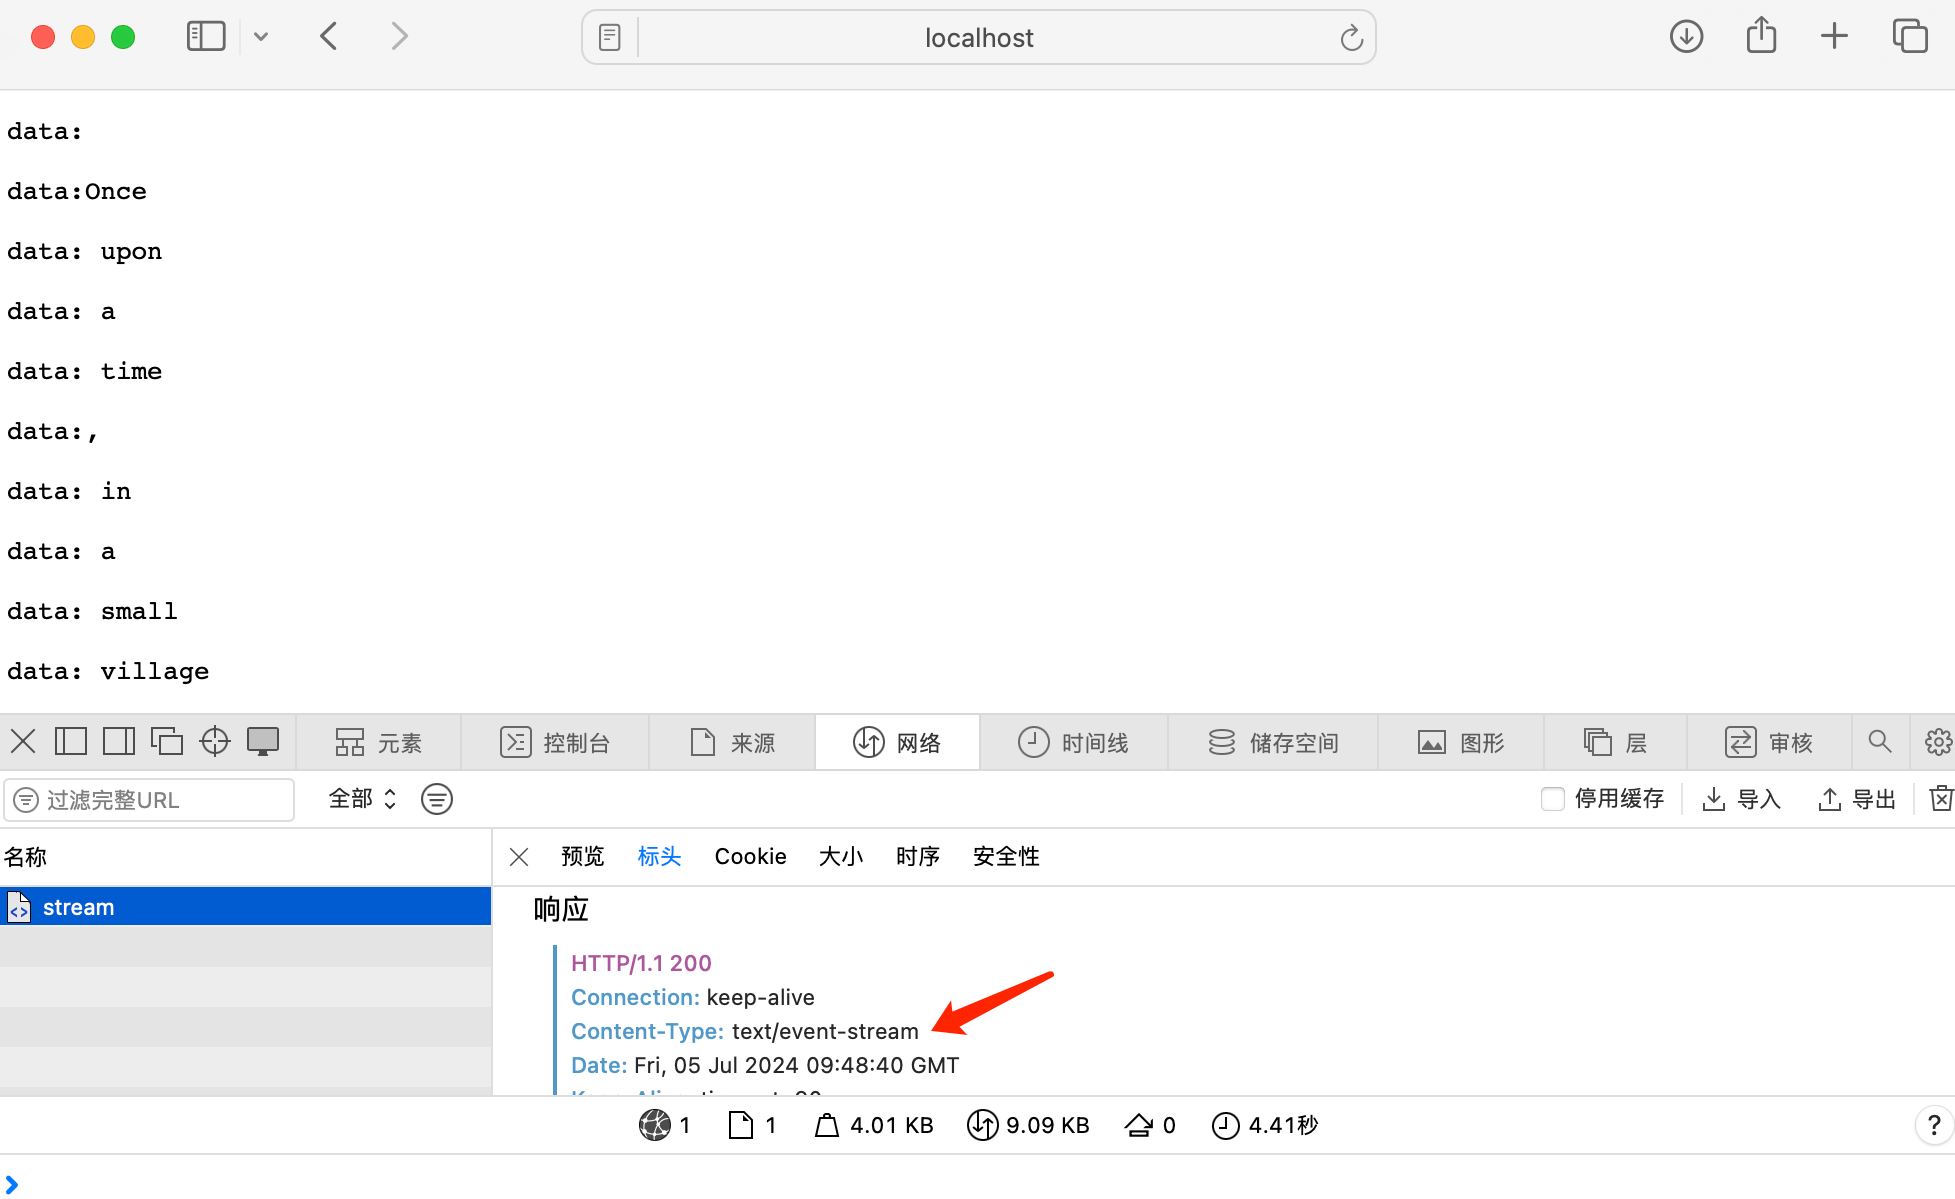
而目前对于对话式的应用场景,主流的调用方式基本采用的是流式对话。什么是流式对话呢?我们常使用的 ChatGPT 使用的就是流式对话,其核心是流式传输,AI 的响应数据是一点一点传过来的,不用等 AI 将文本全部生成出来了才传过来,这在一定程度上能够提高使用上的响应速度。
OpenAI 官网采用的流式传输是由 SSE 实现的,这是一种基于 Http 实现的一种服务端向客户端推送消息的技术。
进行流式传输需要使用到 StreamingChatModel 类,具体实现如下面代码所示:
1
2
3
4
5
6
7
8
9
10
11
12
13
14
@RestController public class StreamController { private final ChatModel chatModel; public StreamController (ChatModel chatModel) { this .chatModel = chatModel; } @GetMapping(value = "/stream", produces = MediaType.TEXT_EVENT_STREAM_VALUE) public Flux<String> generateStream (@RequestParam(value = "message", defaultValue = "Tell a story") String message) { return chatModel.stream(message).flatMapSequential(Flux::just); } }
注意 @GetMapping 注解中的参数 produces = MediaType.TEXT_EVENT_STREAM_VALUE 不能省去,否则无法实现流式传输。
上下文对话 上下文对话的作用就是让 AI 具有记忆力,在之前的对话中,我们是通过一种单一输入输出方式进行调用的,这种调用方式无法让 AI 具有记忆力。
因此,这就要求我们实现一个可以让 ChatGPT 具有一定的记忆力,并根据过去的聊天信息进行回复。
ChatGPT 上下文对话的实现原理较为简单,本质上其实就是将不同角色的聊天信息依次存储在一个队列中发送给 ChatGPT 即可,然后 ChatGPT 会根据整个聊天信息对回复内容进行判断。在 OpenAI 提供的接口中,每条信息的角色总共分为三类:
SystemMessage:系统限制信息,这种信息在对话中的权重很大,AI 会优先依据 SystemMessage 里的内容进行回复UserMessage:用户信息AssistantMessage:AI 回复信息
如果我们需要实现上下文对话,就只需要使用一个 List 存储这些 Message 对象,并将这些 Message 对象一并发送给 AI,AI 拿到这些 Message 后,会根据 Message 里的内容进行回复。
不过,根据 OpenAI 的计费规则,你的消息队列越长,单次问询需要的费用就会越高,因此我们需要对这个消息列表的长度进行限制。
1
2
3
4
5
6
7
8
9
10
11
12
13
14
15
16
17
18
19
20
21
22
23
24
25
26
27
28
29
30
31
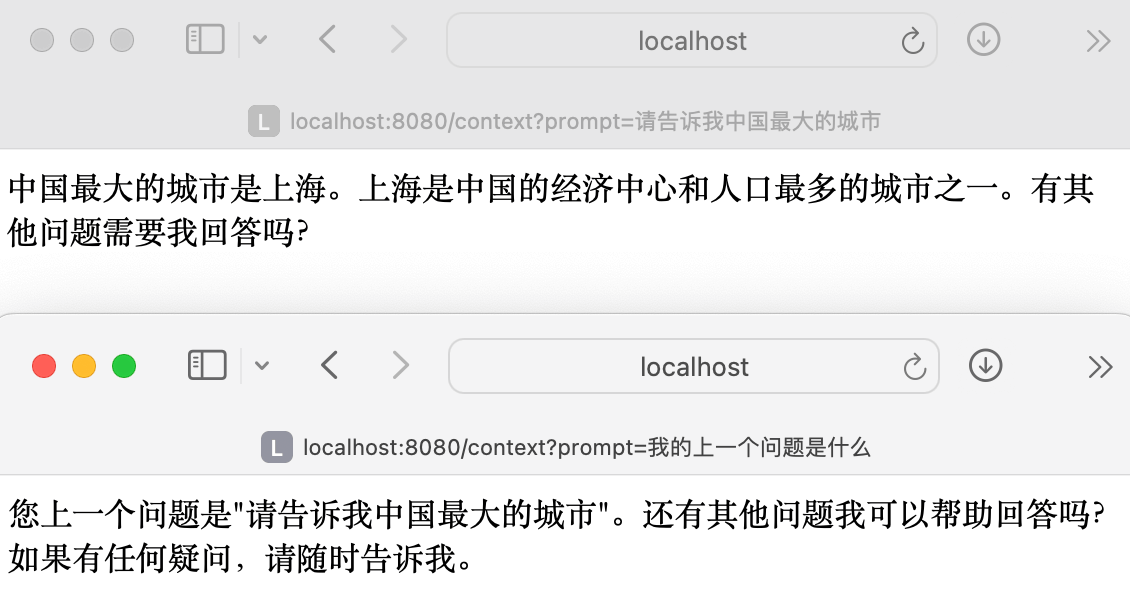
@RestController public class ContextController { private final ChatModel chatModel; static List<Message> historyMessage = new ArrayList <>(); static int maxLen = 10 ; public ContextController (ChatModel chatModel) { this .chatModel = chatModel; } @GetMapping("/context") public String context (String prompt) { historyMessage.add(new UserMessage (prompt)); if (historyMessage.size() > maxLen){ historyMessage = historyMessage.subList(historyMessage.size()-maxLen-1 ,historyMessage.size()); } ChatResponse chatResponse = chatModel.call(new Prompt (historyMessage)); AssistantMessage assistantMessage = chatResponse.getResult().getOutput(); historyMessage.add(assistantMessage); return assistantMessage.getContent(); } }
如图所示,AI 已经能够对聊天历史进行记忆:
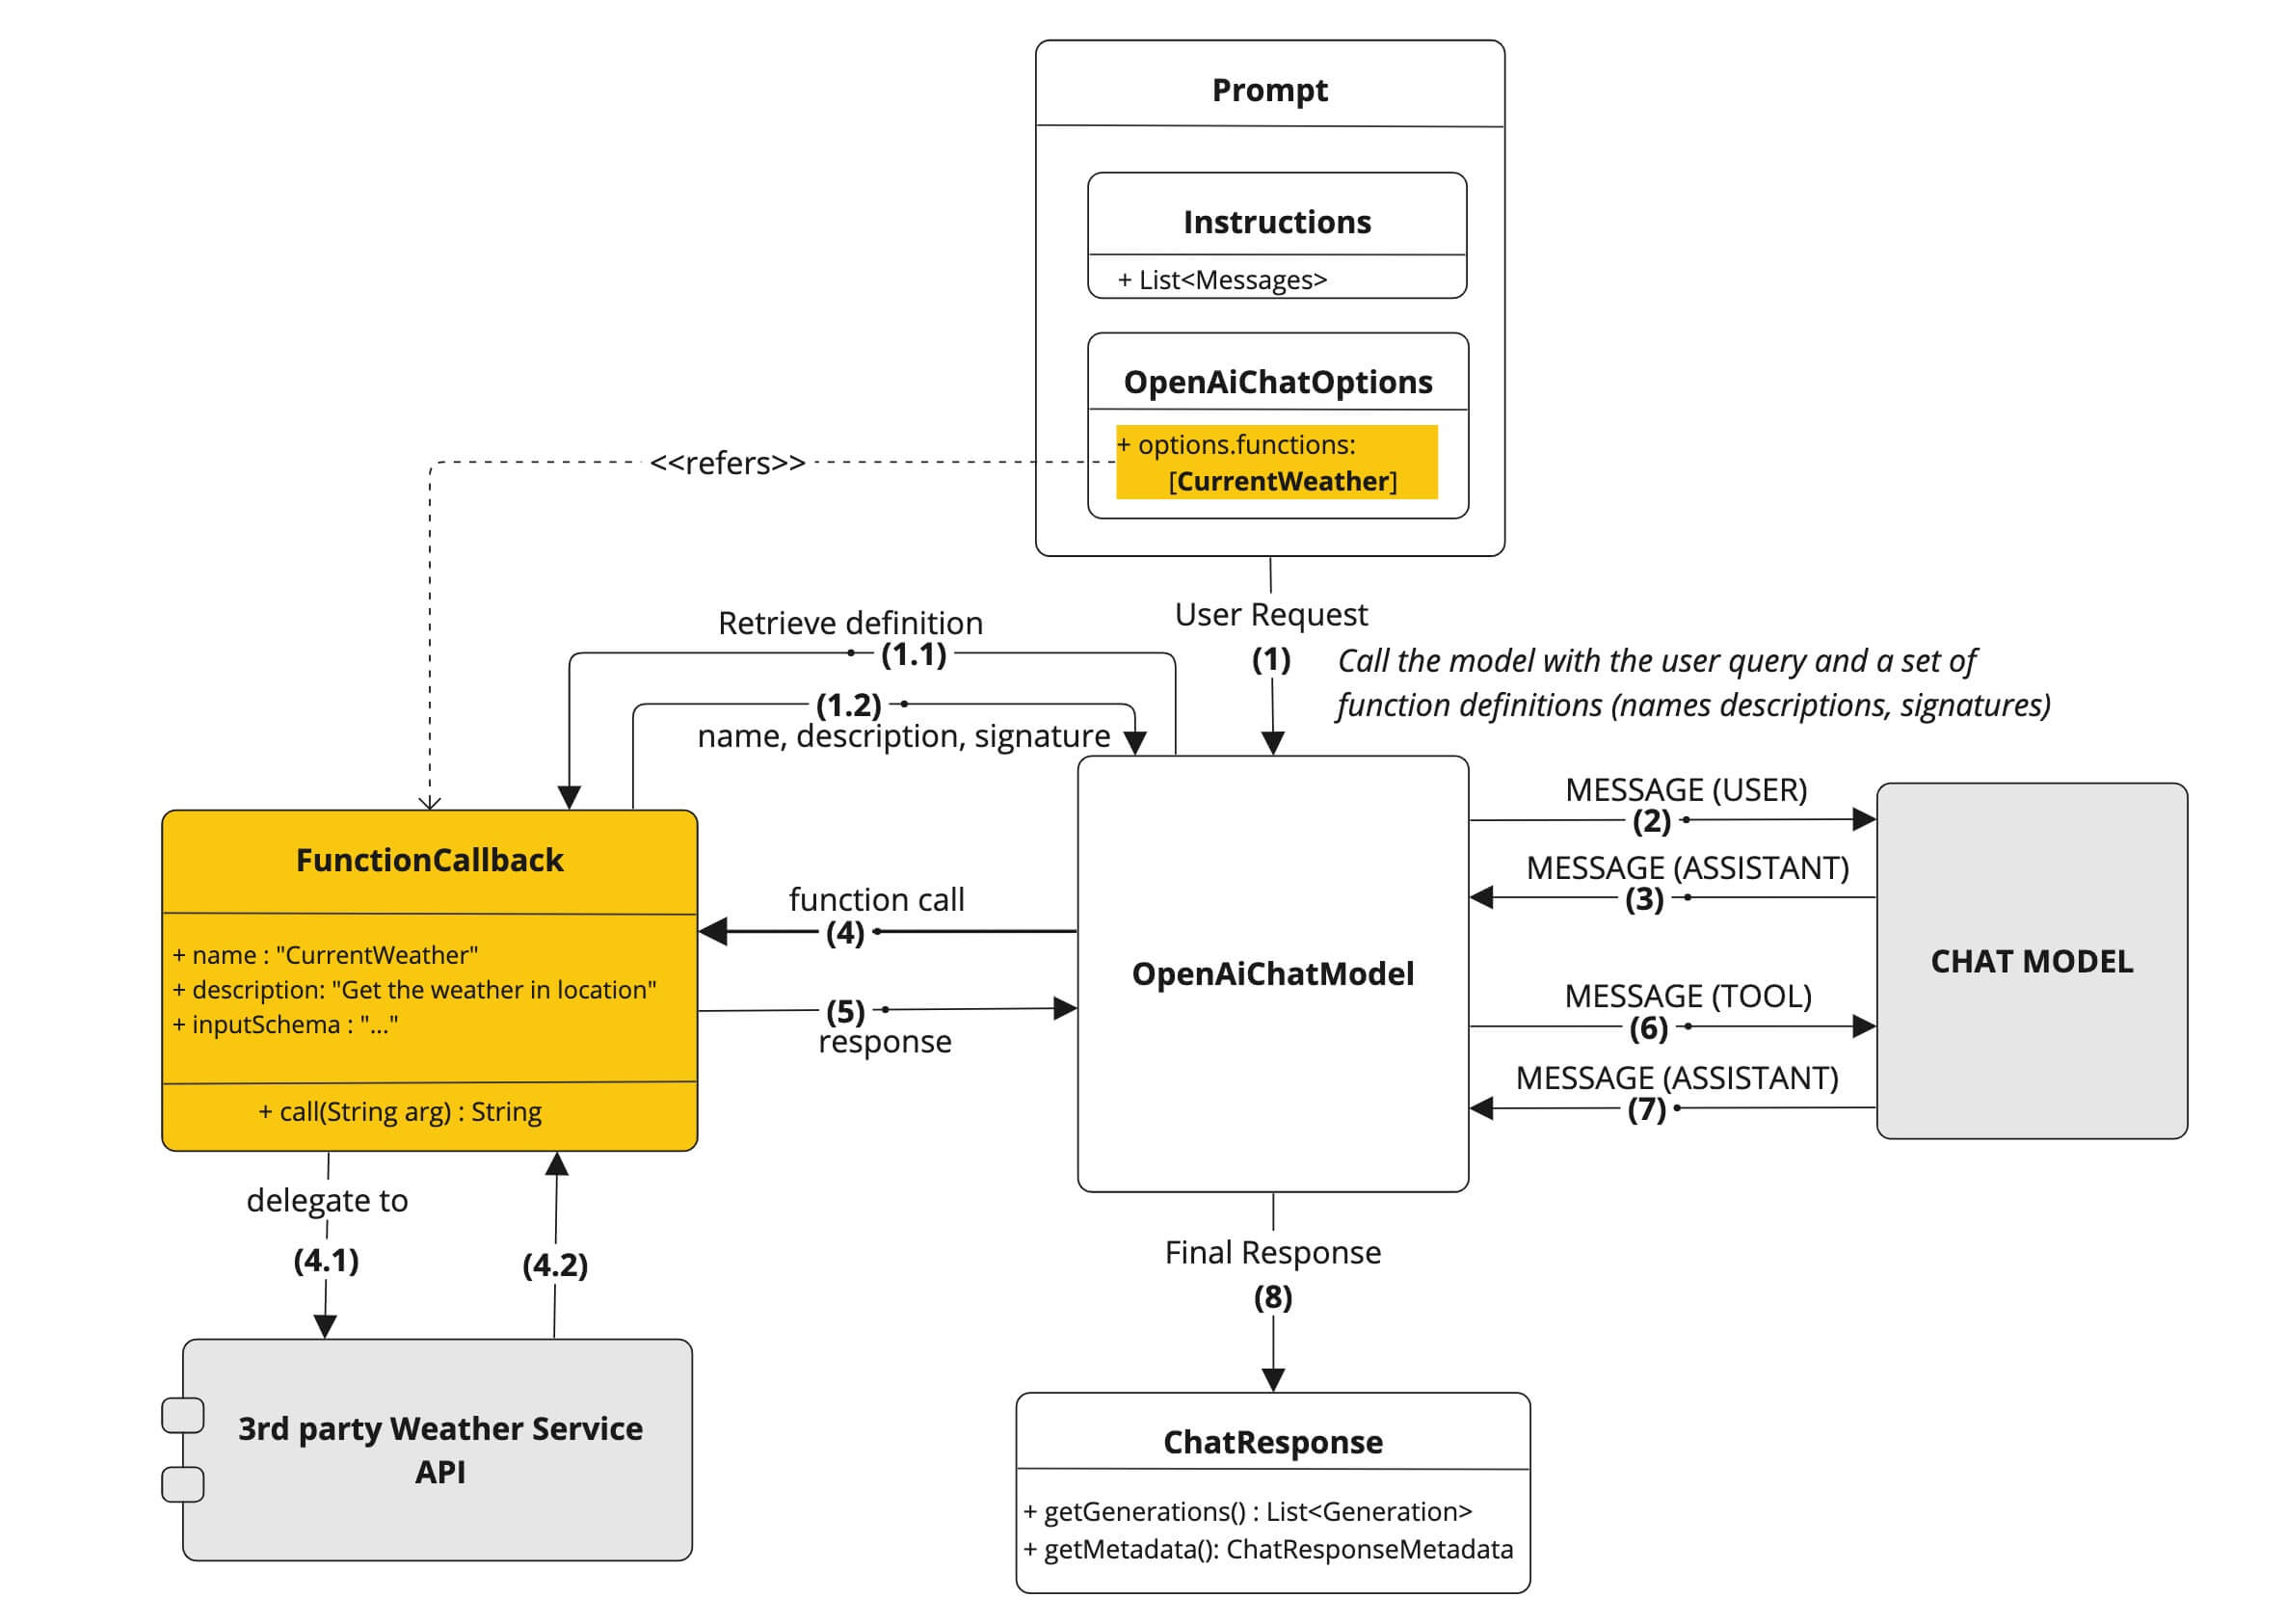
AGENT AI Agent(人工智能代理)是一种能够感知环境、进行决策和执行动作的智能实体。不同于传统的人工智能,AI Agent 具备通过独立思考、调用工具去逐步实现给定目标的能力。
AI Agents = 任务规划(来自 LLM)+ 记忆 + 各类协作工具(访问外部资源)+ 执行/反馈。函数调用(Function Calling )的整体流程可如下图所示:
在该部分,我们希望 AI 能够通过调用 weather api 去根据用户的提问查询天气,并给出回复。首先,我们需要获得 weather api 的 api-key 及 api-url,并在 application.yml 中增加如下字段:
1
2
3
weather: api-key: ${WEATHER_API_KEY} api-url: http://api.weatherapi.com/v1
此处 api-key 依然使用环境变量进行配置。
之后,我们创建 Controller 类,进行功能的实现:
1
2
3
4
5
6
7
8
9
10
11
12
13
14
15
16
@RestController public class FunctionController { private final ChatModel chatModel; public FunctionController (ChatModel chatModel) { this .chatModel = chatModel; } @RequestMapping("/func") public String funcFaq (@RequestParam(value = "message") String message) { ChatResponse response = chatModel.call( new Prompt (message, OpenAiChatOptions.builder().withFunction("currentWeather" ).build())); return response.getResult().getOutput().getContent(); } }
我们使用到了 Prompt 类的构造函数 Prompt(String contents, ChatOptions modelOptions),通过 ChatOptions 的 .withFunction("currentWeather") 确定我们需要调用的 Bean 为 currentWeather。
在 Service 类中,继承了 Function 接口,确定了调用第三方接口时请求体 Request 和响应体 Response 的格式,并通过 apply 方法完成接口调用的具体实现。
1
2
3
4
5
6
7
8
9
10
11
12
13
14
15
16
17
18
19
20
21
22
23
24
25
26
27
28
29
30
31
32
public class WeatherService implements Function <WeatherService.Request, WeatherService.Response> { private static final Logger log = LoggerFactory.getLogger(WeatherService.class); public final RestClient restClient; private final WeatherConfig weatherConfig; public WeatherService (WeatherConfig weatherConfig) { this .weatherConfig = weatherConfig; this .restClient = RestClient.create(weatherConfig.apiUrl()); } public record Request (String location) {} public record Response (Location location, Current current) {} public record Location (String name, String region, String country, Long lat, Long lon) {} public record Current (String temp_f, Condition condition, String width_mph, String humidity) {} public record Condition (String text) {} public Response apply (Request request) { log.info("Using Weather API" ); return restClient .get() .uri("/current.json?key={key}&q={q}" , weatherConfig.apiKey(), request.location) .retrieve() .body(Response.class); } }
我们通过 weatherConfig.java 来将 yml 文件中设置的 api-key 及 api-url 传入 Service 类中,具体实现如下:
1
2
3
@ConfigurationProperties(value = "weather") public record WeatherConfig (String apiKey, String apiUrl) {}
注意: 对应的,还需要在启动类上增加注释 @EnableConfigurationProperties(WeatherConfig.class)!
最后,通过在 FunctionConfig.java 中声明一个 Bean ,名字要与 Controller 类中使用到的 .withFunction("currentWeather") 中的一致。
1
2
3
4
5
6
7
8
9
10
11
12
13
14
15
@Configuration public class FunctionConfig { private final WeatherConfig weatherConfig; public FunctionConfig (WeatherConfig weatherConfig) { this .weatherConfig = weatherConfig; } @Bean @Description("Get the current weather in location") public Function<WeatherService.Request, WeatherService.Response> currentWeather() { return new WeatherService (weatherConfig); } }
这样,当询问 AI 相关信息时,它便会决定是否要调用工具,并返回对应的值,比如,我们询问 AI “北京天气怎么样” 时,他便可以给出正确的结果。
参考文章 SpringAI 官网 - Spring AI
Bilibili - Java大模型专栏- Spring AI 入门
CSDN - Spring AI - 使用向量数据库实现检索式AI对话
